
Easter Bunny Buns #BreadBakers
Easter Bunny Buns are cute little buns for your kids to enjoy during Easter or any day. They are easy to make and can be enjoyed with a curry or on the side or just as is for breakfast.
It's fun to experiment with bread. Kids love colour and shape and they get excited when they see that in their daily food. So are my kids.
My daughter absolutely loves this Indian Pav I make and the moment I start rolling it, she is all excited. She cannot wait for it to bake and cool down. So, this time I told her I am making Bunnies for her. She was thrilled. I could see the excitement in her eyes. She was watching me shaping these cute little buns and enjoying the process.
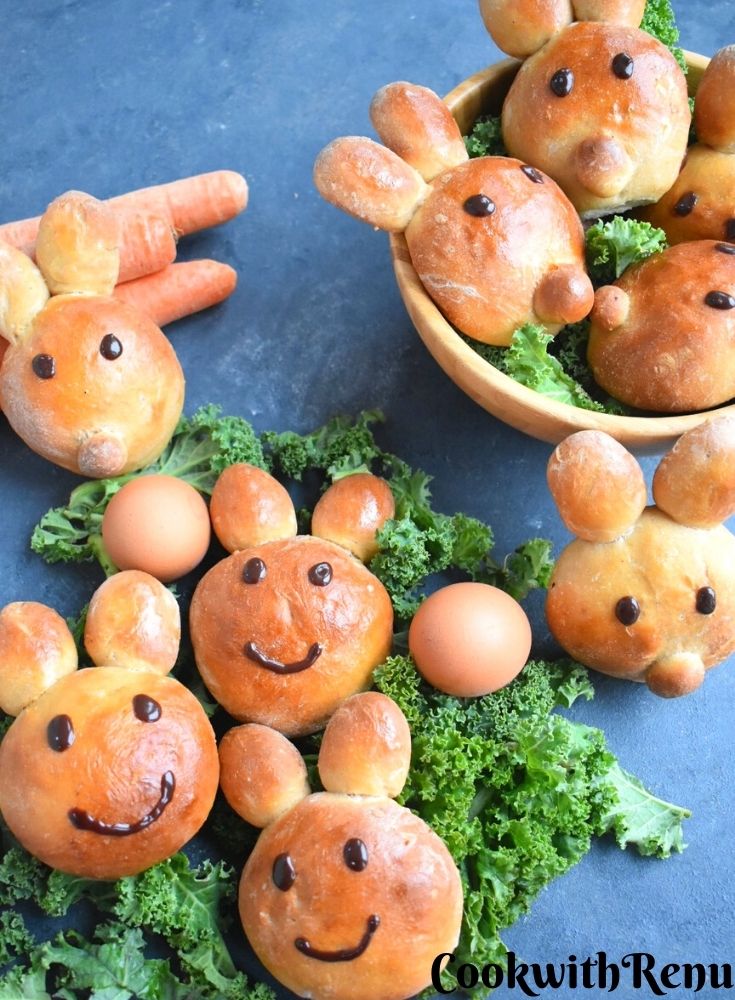
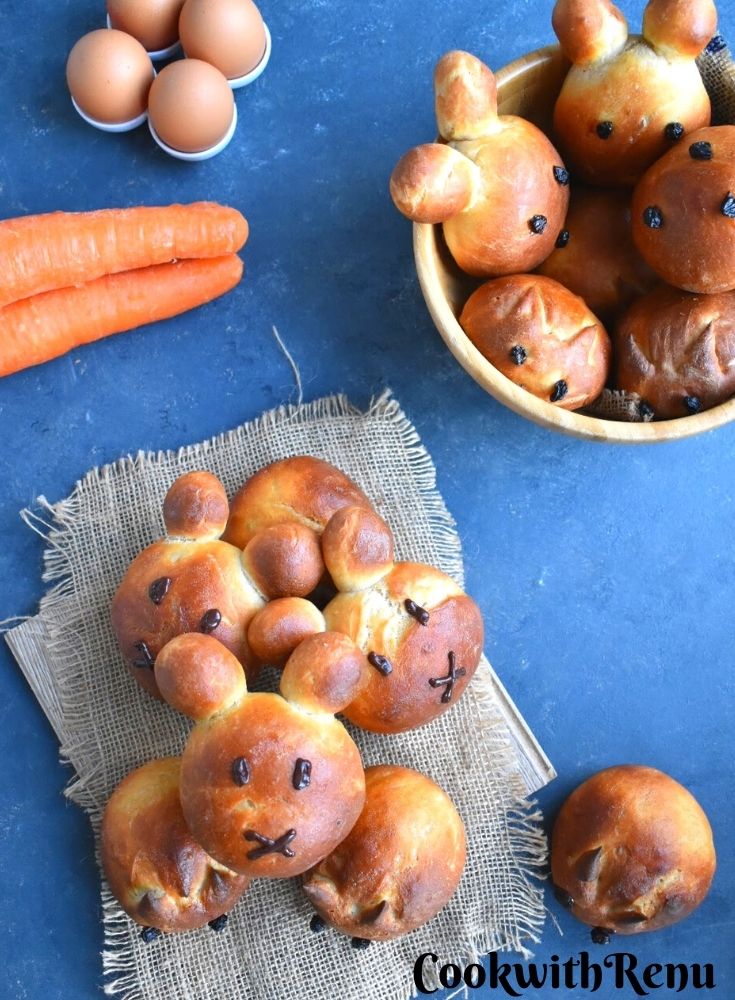
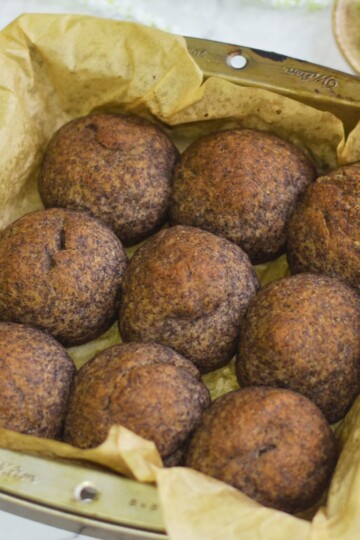
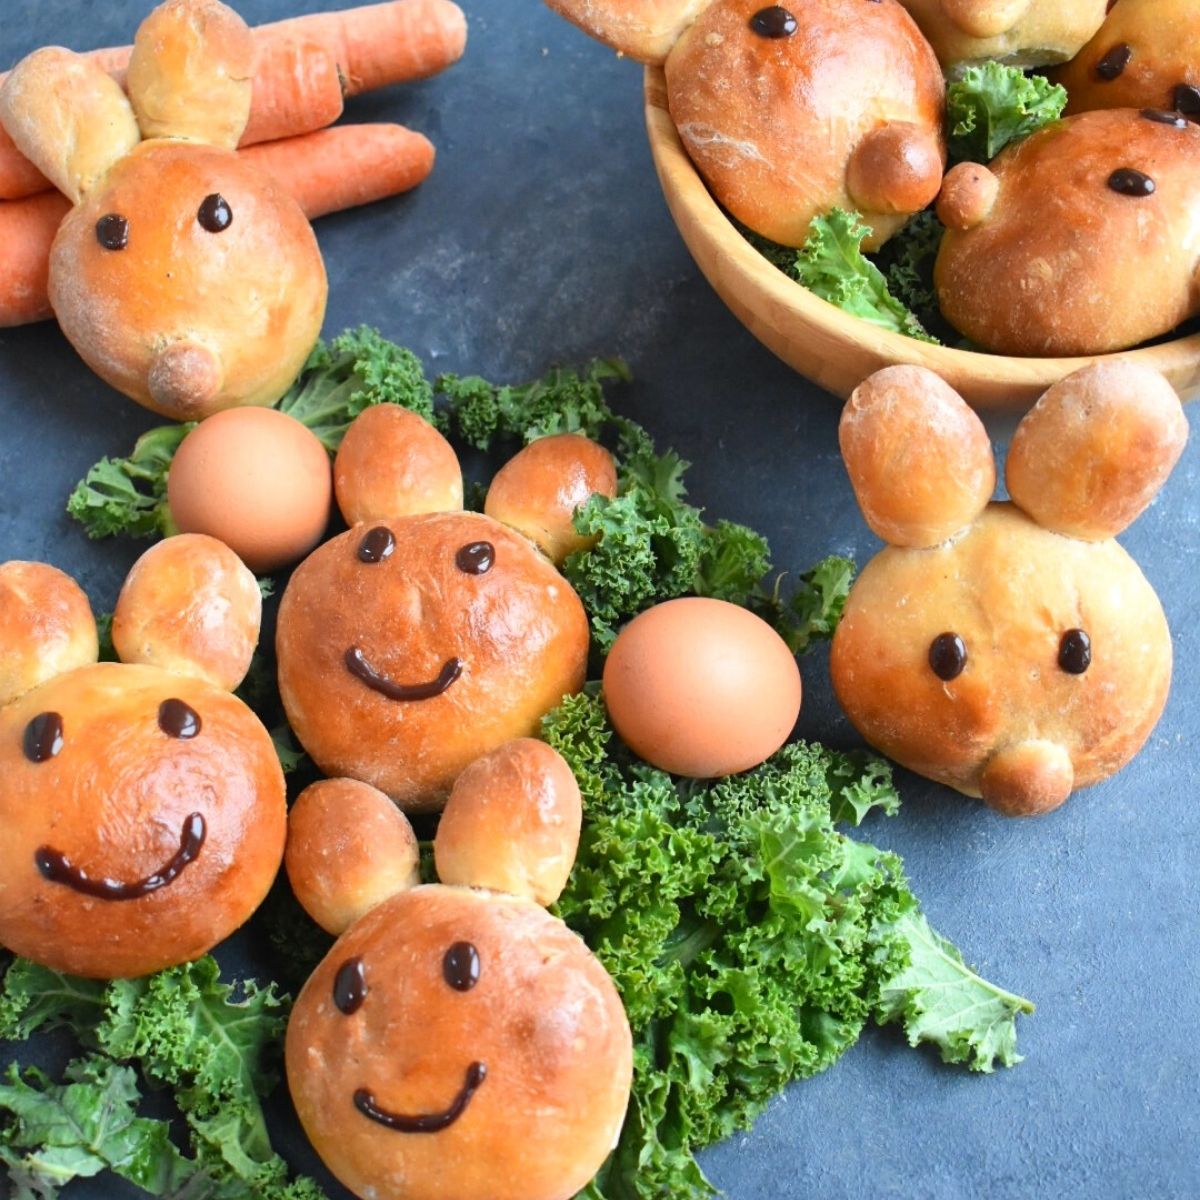
Can you imagine I made this twice in a week? Both attempts were good. It was just the cosmetic changes. In my first attempt, the face of the bunny looked a bit sad, as I did the piping slightly wrong. (Image below) And daughter's feedback the ears are small for a bunny.
So, I did not like the sad facing bunny and made it again :D. This time with happy faces and big ears. Not sure if that was enough for her 😊.
Another such similar recipe where I have made shapes from bread is this Spooky Halloween Stuffed Bread. Here I have made bread in the shape of snake and witch hat and stuffed it with pizza stuffing. There are even small snakes or snake breadstick. Another fun and exciting project with kids.
Shaping the Bunnies
In both attempts I experimented different ways to shape the bunny. I even tried to cut the bunny ears once individual dough ball had risen. But I was a bit nervous to do so. Though I was able to shape the ears, but I was not 100 percent happy with the results.
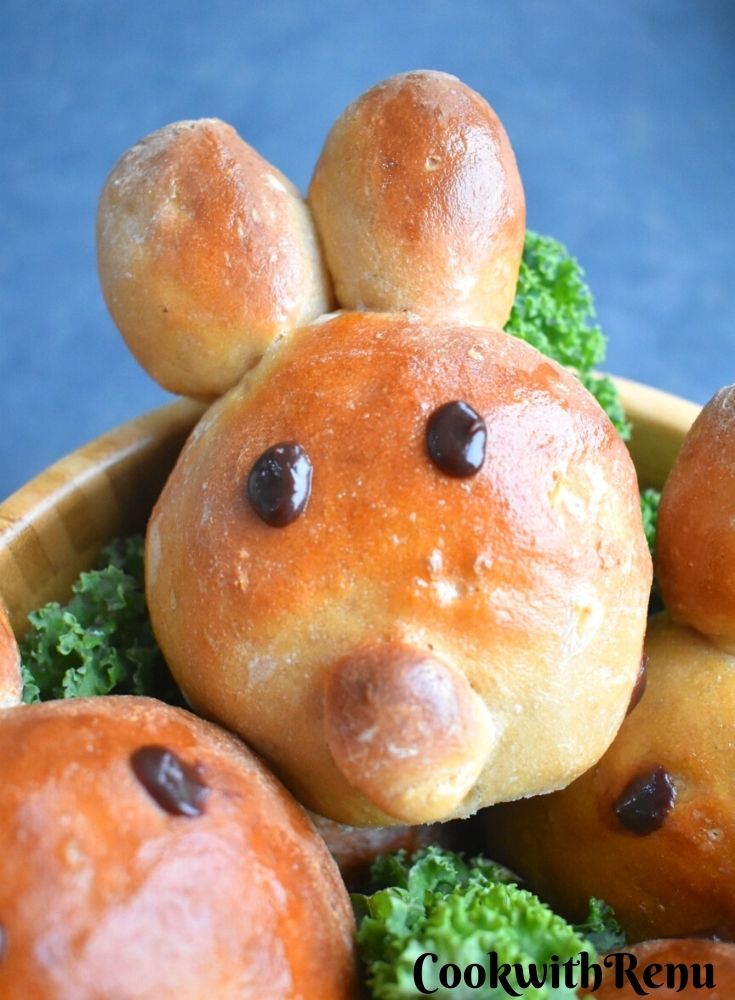
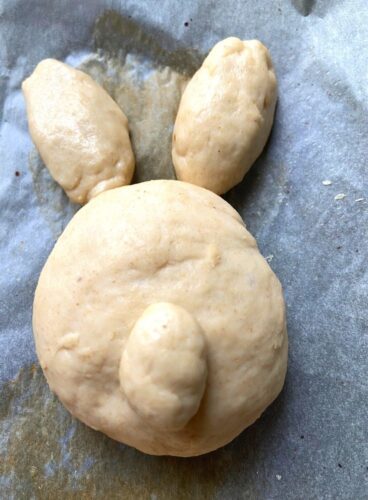
A very simple shape would be to shape the face in round. Then just put two elongated flattened cylindrical shape on the top of the middle circle to form ears.

To make Eyes and mouth
For mouth one can put some dough in the centre of the face. This looked good and maybe I will try a few more before adding it here.
I preferred to decorate the eyes and mouth with simple chocolate icing. As I have the control on the way it looks. To decorate it with chocolate icing, all you need is too let it cool down first or else the chocolate will melt.
I also used simple raisins to decorate the eyes and mouth in few. You just insert it before baking. However, the raisins at times might get slightly burnt.

Flour used to make Buns
I have used a combination of All-purpose/Plain flour (Maida) and Whole Wheat flour (Atta - The one I use to make our Indian Chapati or flatbread). I used a 50-50 percent ratio. You can use 100% All-purpose/Plain flour (Maida) if you like.
Are these buns Soft?
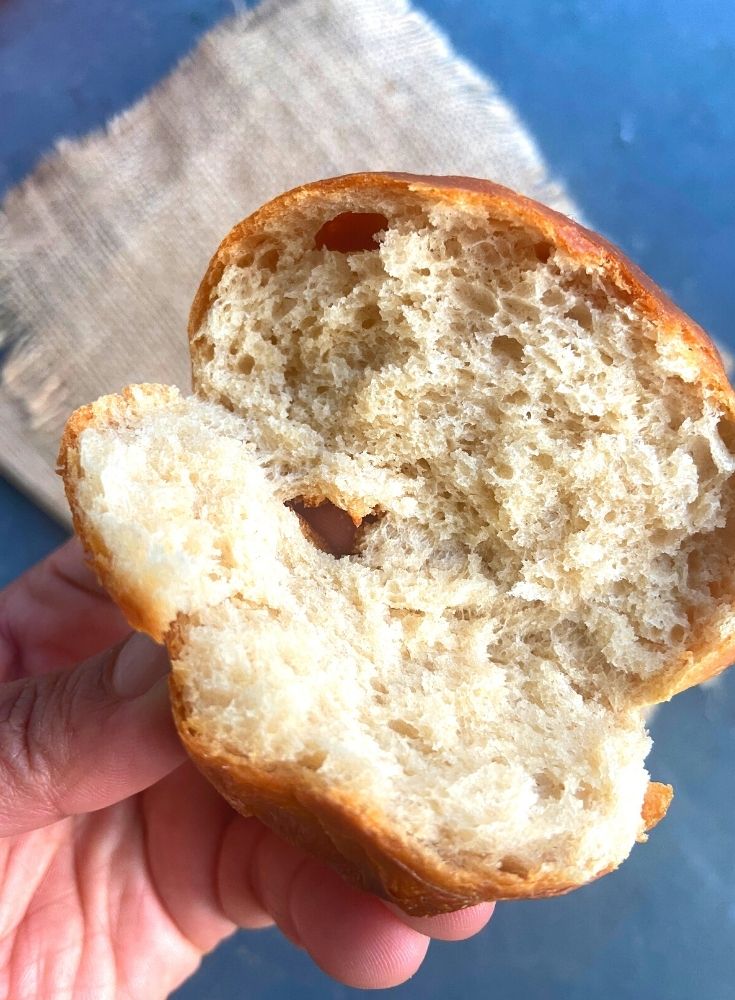
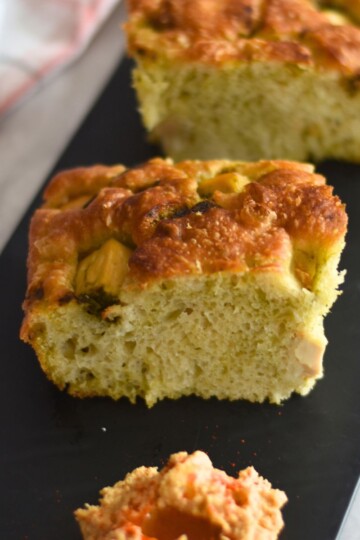
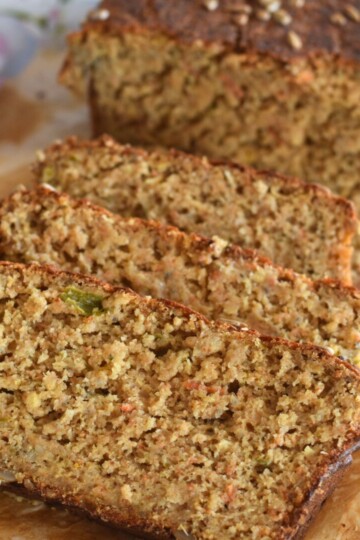
The buns are soft, and you can see the texture for yourself in the pic below. But, as I have used a combination of flour, they get a bit dense the next day. Though the taste and texture are not compromised. Similarly, If you use 100% whole wheat flour, the buns would be a more dense than usual.
How long does the buns stay fresh?
As these buns are preservative free, it will not stay fresh for long as the store brought ones. It is best to consume them in maximum 2-3 days. They are best to consume the same day. They will be good the next day, but not as fresh as day one.
How to store these Buns?
I wrap these buns in a muslin cloth and keep them lightly covered in a breadbasket or a large box with a lid.
Can I reheat the bread/buns in microwave?
Yes, you can, but whenever you heat a bread/bun in microwave, be sure to keep a small cup with water while reheating. Or else the bread will lose its moisture and be hard. You will not be able to eat it.
Can I make the buns Vegan?
Yes, you can. I have used a combination of milk and water for kneading the dough. However you can use only water, or any plant based milk. I have used olive oil for kneading instead of butter. You can use any flavourless vegetable oil.
I like to slightly brush my buns with butter. You can lightly brush it with olive oil, or if you need to add some taste, may be garlic and olive oil or any herbs and olive oil. It will add some unique taste to it. You can even completely skip the process of brushing it with oil or butter.

Easter Bunny Buns
 Print
Pin
Rate
Save
Cook Mode
Share Recipe
Print
Pin
Rate
Save
Cook Mode
Share Recipe
Equipment
Ingredients
Yeast Mixture
- 1 packet 7 grams - 2 ½ teaspoons Fact Action Dry Yeast / Rapid Rise Yeast
- 1 teaspoon Sugar
- ¼ Cup - 60 ml - Lukewarm water/Milk for yeast
Dough
- 4 cup 630 grams - 2 Cups packed All- Purpose Flour/Plain Flour/ Maida + 2 Cups Whole Wheat flour (Atta)
- 1 ¼ teaspoon 12 grams Salt - as per taste
- 1 cup - 235 ml - LukeWarm Water - More or Less might be required depending on flour
- ¼ Cup - 60 ml - Lukewarm Milk More or Less might be required depending on flour) - Any Vegan Milk can be used or simply replace with water
- 2 tablespoon -30 ml - milk for brushing the buns
- 2 tablespoon -30 ml - Olive Oil
- ½ -¾ tablespoon more oil for coating the bowl and the buns
Instructions
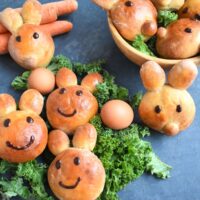
Blooming of yeast
- In a medium-size bowl, add in ¼ Cup of Lukewarm mill. The milk should be lukewarm, just enough warm that you can easily dip your finger in it.
- Add yeast and sugar in the water and give it a mix.
- Cover and let it sit for 10 minutes. If your kitchen is cold, cover a wide bowl on top of it or let it sit in microwave or oven (basically in a closed location - do not switch on microwave or oven)
- If your yeast mixture has not bloomed properly the yeast is dead and you would need to work with new yeast. At times even before the expiry date it is dead. So always bloom the yeast and check before adding in the dough.
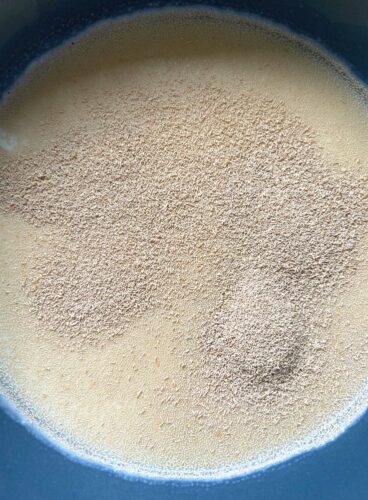
Making of Dough
- In a wide bowl or your stand mixer sift the flour and add the salt and give everything a quick mix.
- Add in the bloomed yeast mixture and give everything a mix.
- Mix in the remaining Lukewarm milk + water in a bowl.
- Now, slowly add the water milk mixture.
- Keep on adding the liquid ¼ cup at a time until you get a sticky dough. One should be able to add around 1 ½- 1 ½ cups of liquid in total.
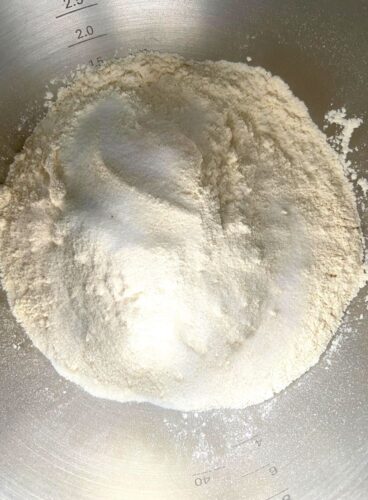
- If you are kneading it with your hand, take the dough mix on a clean kitchen working area.
- Knead this for a good 5-10 minutes until the dough comes in together.
- If using a stand mixer just knead the dough using the kneading hook slowly incorporating liquid.
- First on slow speed until the dough is well incorporated and then on high speed for around 5 minutes.
- Once the dough comes together, add in the oil again ½ tablespoon at a time and knead it with your hand until you form an elastic dough. If you form a dent the dough should spring back in a few seconds.
- For the stand mixer follow the same, by slowly adding the oil and kneading on medium speed until the dough is elastic.
- Now form a rough ball from the dough.
- Grease the bowl of a stand mixer or a wide bowl.
- Keep the bowl covered in a warm kitchen location. One can even keep the bowl in the oven/microwave with oven/microwave switched off and oven door closed. Do not turn the oven/microwave.
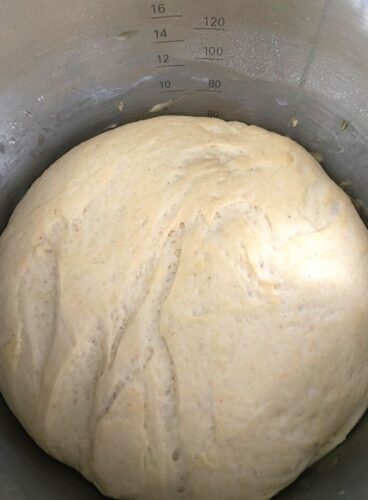
- Let the dough rest for 75-90 minutes until doubled.
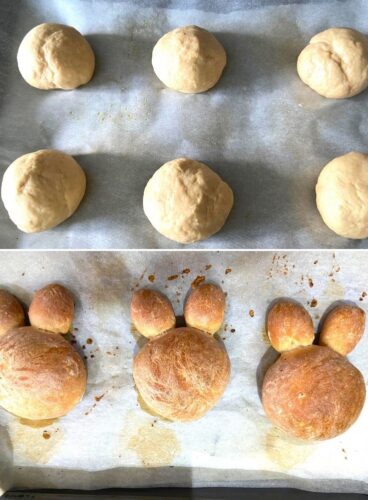
- Once the dough has doubled in size, pinch the dough. Give it a rough knead for a minute and divide it into equal size balls/buns. One can measure and divide too, I eyeball it. If measuring one bun size is around 80 grams.
- Shape the ears and put it on top of the circle.
- If required, you can even shape the mouth using a small dough.
- Arrange the buns in a baking tray lined with parchment paper or greased lightly with oil.
- Space out the buns leaving a gap in between for the buns to rise.
- Cover it with a clean muslin cloth and let it rest for 30-40 minutes.
- Again, one can keep it on the kitchen counter or the tray in the oven/microwave with oven/microwave switched off and oven door closed.
- Once the pav buns have risen, i.e. after 30-40 minutes preheat the oven to 200 Deg C / 392 Deg F. (Remember if you have kept the oven tray in the oven, remove the tray from the oven before starting to preheat)
- You can brush the buns with milk. This will however darken the colour of the buns. (So, I brushed it at the end of 5 mins of baking time., you can skip it completely.)
- Bake this in a preheated oven for 20 minutes.
- If the oven is hot from one side or has uneven heating, around 10 minutes just rotate the tray. Be a bit quick so as not to escape the heat.
- Do not exceed the baking time of 20 minutes or your buns will go hard.
- After 20 minutes remove from the oven.
- You can apply butter or oil as required. (Just lightly, do not overdo it)
- After 5-10 minutes gently lift the parchment paper and let this cool on a wire rack.
- If you have not used parchment paper, just let the whole tray sit on a wire rack.
- Once cooled keep the buns covered with a muslin cloth. This helps them not to get dry and retain moisture.
Notes
- Temperature plays an important role in bread making. Water and milk should be lukewarm.
- The yeast mixture must be bloomed using lukewarm water/milk. It must be lukewarm and not hot or else you will kill the yeast.
- Always test the yeast first if it is getting bloomed and then only add to the flour. The butter must be melted or in semi-soft form but at normal temperature. It should not be cold.
- If you are using butter or milk from the fridge it is best to let it come to room temperature or slightly warm them up. But not hot. The cold temperature will not let the yeast work and hot will kill it.
- Oven temperatures are different, so do keep an eye after 17 minutes.
- 1 Cup = 235 ml, 1 tbsp= 15 ml, 1 teaspoon = 5 ml
- Weight of the flour at times differs. For me it was around 630 grams, for a combination of flours. It can vary
Welcome to Bread Bakers! This month, our theme is Animal Shaped Breads and our host is Stacy from Food Lust People Love.
- Beef and Sweet Onion Dim Sum Pandas from Karen's Kitchen Stories
- Bird Bread Rolls from Ambrosia
- Easter Bunny Buns from Cook with Renu
- Ham and Cheese Elephant Rolls from Food Lust People Love
- Hedgehog Bread from Making Miracles
- Honey Bear Loaf from A Day in the Life on the Farm
- Sourdough Animal-shaped Breads from Zesty South Indian Kitchen
- Matcha Milk Bread Turtles from A Messy Kitchen
- Meyer Lemon Custard-Filled Matcha Turtles from Culinary Adventures with Camilla
- Peacock Shaped Pizza Rolls from Magical Ingredients
- Piglet Bread Rolls from Sneha's Recipe
- Turtle Bread from Passion Kneaded
#BreadBakers is a group of bread loving bakers who get together once a month to bake bread with a common ingredient or theme. You can see all our lovely bread by following our Pinterest board right here. Links are also updated after each event on the #BreadBakers home page. We take turns hosting each month and choosing the theme/ingredient.
Tried this recipe? Please comment and rate the recipe. Share your pics and tag us.
Subscribe to my email list to get the new recipes straight into your mailbox.


Smiley bunnies these are, look good!
Chocolate eyes and mouth are perfectly appropriate, possible a requirement, for Easter bunny buns! These would be such fun for an Easter brunch!
Adorable....going on the Easter Menu for sure...Hope to have my sous chef back in the kitchen with me by then.
These will be perfect for our Easter table. Thanks for the inspiration!
These are just ADORABLE! My daughter would have fun helping to make a batch of these too! 🙂
Easter bunnies looks really cute.
These are happy bunnies! I love all of your experiments. I'm sure the kids adored these.
The bunnies look great with a smile. Excellent presentation with greens and carrots! This is a perfect side for Easter!
Just adorable! It almost looks like they have a glaze, did you brush with butter after removing? Seeing that, I would be tempted to do a super thin powdered sugar glaze on them. Yum!
Yes I did a butter glaze, but yes you can go with the powdered sugar one. I am tempted to try that one now 🙂
I love the bunnies with noses.
Hello Renu, your bunnies are super cute. Love their smiling faces. My kids insist on baking these next. The crumb is super soft. Thanks for the clear instructions!
Ah loved that your kids love it. Thank you so much